

Graduation Money Holder (Part Two)
Last week, I created the first part of the tutorial to show you how to make a Graduation Money Holder envelope in Cricut Design Space™. This week, I will show you how to create the money insert in Design Space™ and I have included the list of supplies used at the very bottom of this post.
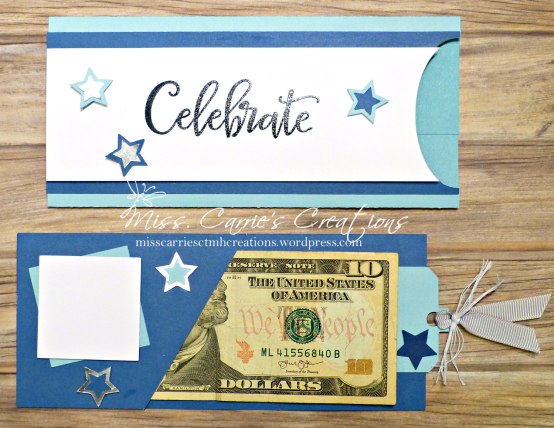
Design Space Instructions:
1. Insert a SQUARE SHAPE and resize to 3″w x 7″h.
2. Insert a SQUARE SHAPE and resize to 3″w x 4″h.
3. Insert a TRIANGLE SHAPE and resize to 4″w then ROTATE 30°. Position the Triangle over the top of the 3″ x 4″ rectangle.
4. Select the Triangle and the Small Rectangle and choose SLICE. DELETE the unwanted images.


5. Insert a Tag Image and resize to fit the top of the Money Holder Insert. (I used Luggage Tag – #M275FA92 from the You Are Here Collection.)

6. Add stars and a square to write a sentiment onto the “Pocket”.

Once the images are cut out, place adhesive ¹⁄ 8″ along the left side and the bottom to form a pocket. This will allow you to easily slide the gift in from the right side. Adhere the remaining layers and stars, then add some matching ribbon to the tag to pull-out the insert, and you are ready to give this to the hard-working graduate.

This Graduation Money Holder can be made from any cardstock color or patterned paper. I can’t wait to see what you create with this tutorial!

 VersaMark Ink Pad |
||||


* The links provided to the Cricut® website are through the ShareASale affiliate program and are posted as an endorsement. ShareASale compensates me a small portion of sales made through these advertisement links.
Thank you so much for a great tutorial
You are welcome. I try to create a few a month for all of you.